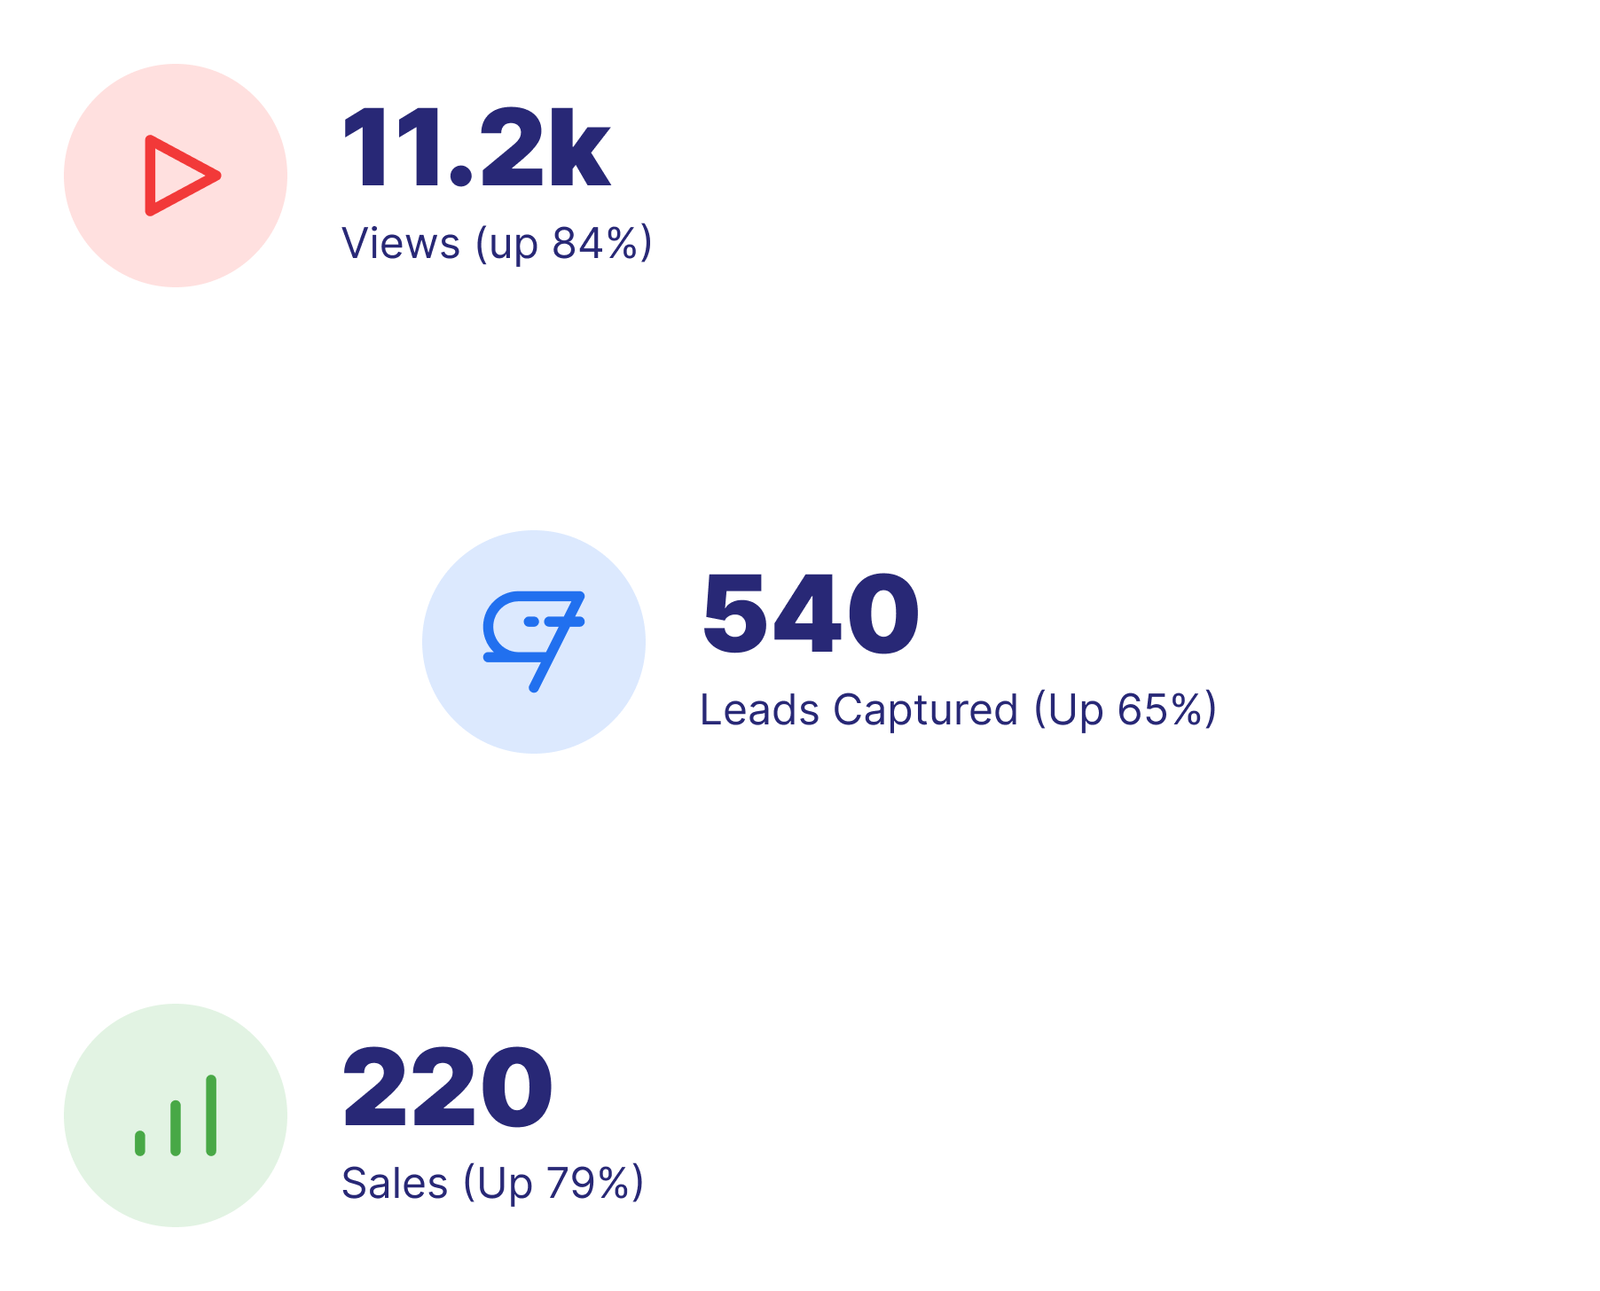
Video personalization is a highly effective way to drive viewer engagment and interaction. Mindstamp makes it easy to personalize any video in seconds.
At Mindstamp, we believe there are two ingredients in making an outstanding interactive video experience: Engagement, and Personalization. By adding interactions like hotspots, buttons, and questions to your content, you’re boosting engagement. Personalization, though, is what makes each experience feel custom tailored and unique to the individual on the other side of the screen.
The Mindstamp interface allows you to efficiently capture viewer info in a number of non-intrusive ways. Pre-content viewer info capture, in-video questions, button clicks, and more, are all ways to gather information about your viewer. You can then take that information (or information you already know about the viewer!) and re-use it in-video later on. This could mean visually reaffirming a selected meeting date, addressing viewers by name, or adding CTA’s that have their preferences on them, to increase click-through!
Setting up variables in Mindstamp is easy! Once you click on an interaction to add it to your video, you’ll see a “Store Variable” option in the configurator. This allows you to assign an internal “code” of sorts to viewers' answers. That code can then be placed anywhere that text exists throughout the video (comments, interactive text, buttons, etc.) and it will automatically replace the “code” with the viewer's answer choice. In the example below, we initiate a “Date Response” question in which we ask a client when they’d like to meet.
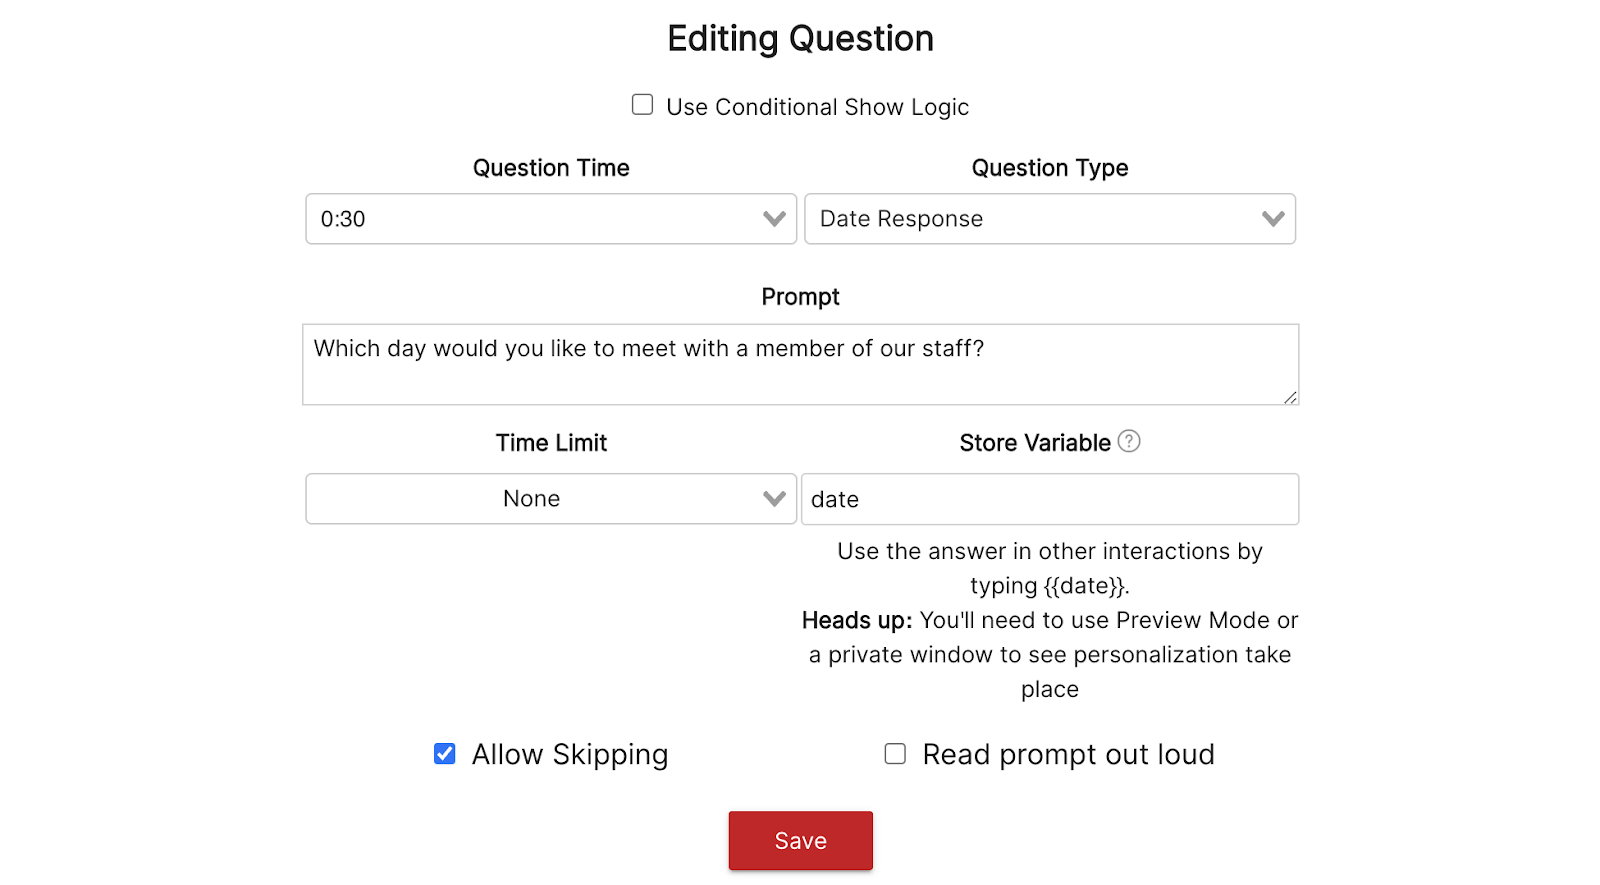
As you can see, we’ve chosen to store their answer as a Variable called “date.” So, whenever we use the Variable code {{date}} in this experience, it’s going to be dynamically replaced with whatever the user answers. We’re going to add a comment confirming the meeting date. Here’s what it would look like from the configurator:
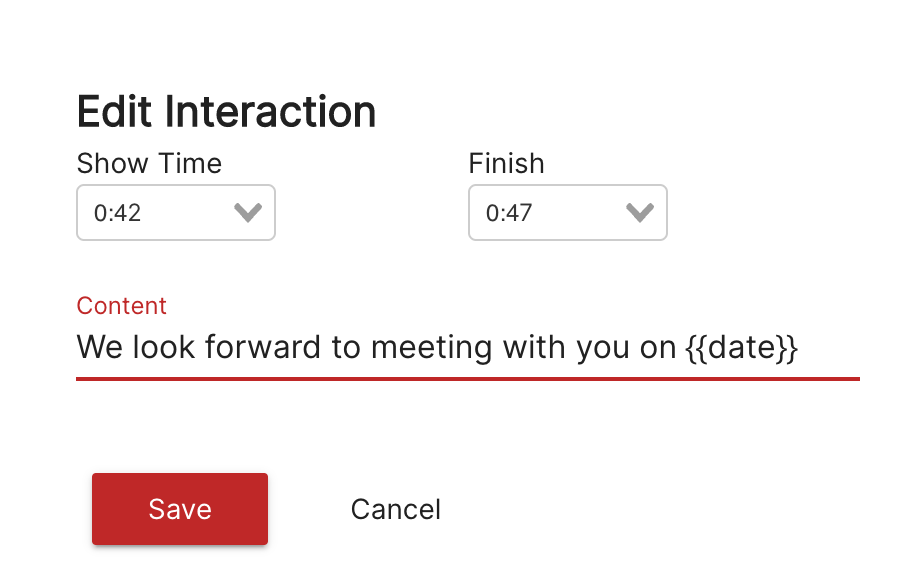
Here’s what it would like to a viewer after they’ve answered the question and “set” the Variable:
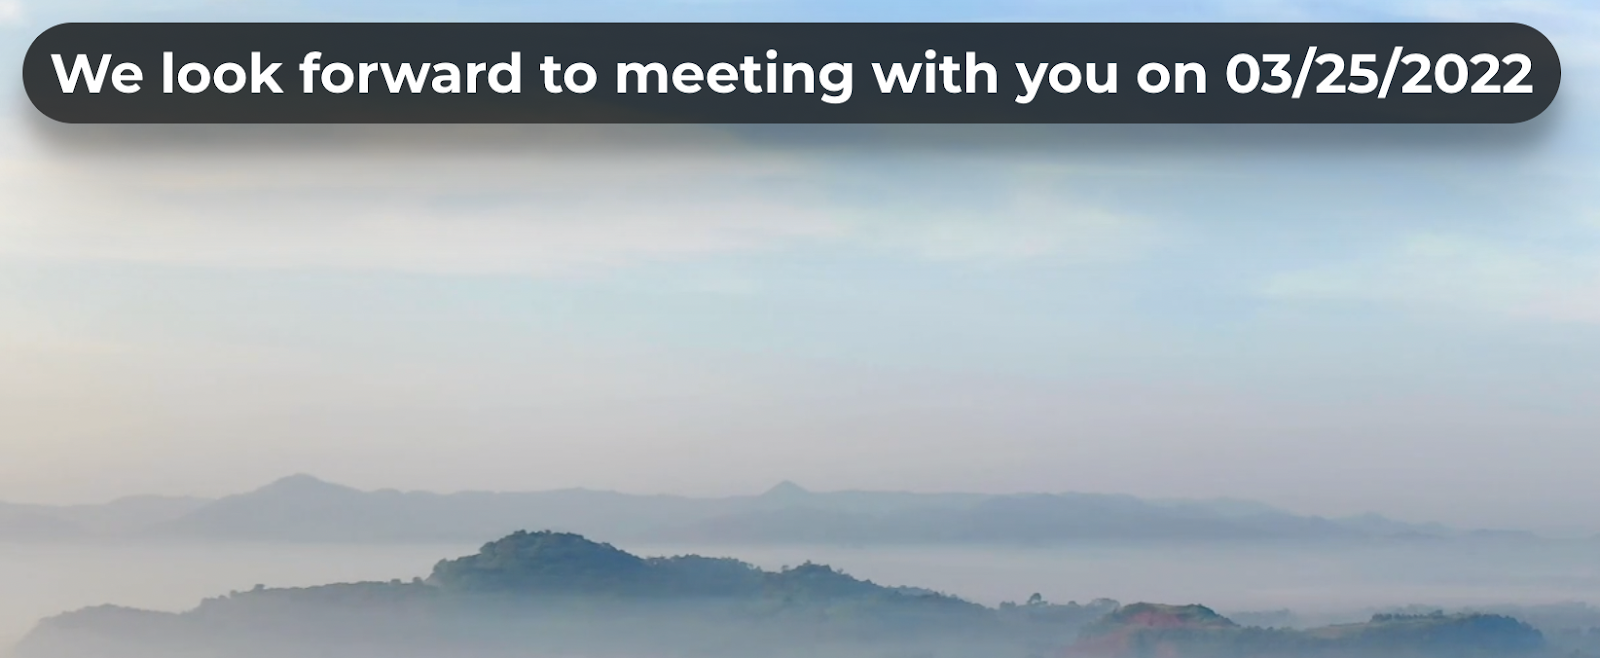
As you can see, the {{date}} variable was automatically changed. This means that this single video can dynamically accommodate the specific needs of your entire viewer base - all with that personalized feel!
There are many scenarios where you would benefit from using variables in your interactive video. Check out a couple of examples to get you started!
So what if you want to use a piece of viewer information that you already have before they watch the video? With Mindstamp - you can! To pass in variables, simply make this small change at the end of your videos URL (colors used to show different elements):
?variable1=variable1Value&variable2=variable2Value
So the “?” starts the variable, then you add its name, followed by the =answer. To add multiple variables, connect them with “&”. In the example above, we used two variables. Here’s what the chain would look like in a real example where we pass in someone's name and favorite food. The original video link is in bold, followed by the variable elements in the colors we’ve used.
https://myinteractive.video/go/mindstamp/WXpkDbYE?name=Tyler&food=pizza
That’s it! Now, in your video, anywhere that you’ve placed {{name}} or {{food}} will have the information you passed in through the URL automatically populated.
With so many ways to customize your video using variables, we can’t wait to see what you’ll come up with! Start personalizing your interactive video today.
Interested in learning how variables can be used to create “if…then” commands in-video, and show specific users certain interactions based on answers? Check out our article on Conditional Logic here!