
With 54% of consumers wishing to see more video content from a brand or business they support, video has become a medium that is extremely powerful. In addition to being an excellent way to deliver your message, videos can also be modified to make it more interactive and engaging using a platform like Mindstamp.
Mindstamp's interactive video platform is one of the most effective tools for creating and sharing interactive videos that engage viewers. But there are times when the video size is too large, affecting both the creator and the viewer's seamless video experience. In such a scenario, video compression comes in handy.
In this article we’ll explore:
A major problem that arises in videos is that making high-quality videos requires a lot of data. Video storage demands can quickly fill up your computers and hard drives, causing your computer to run slowly, freeze or even crash. Additionally, uploading or sharing these videos to online platforms can take a considerable amount of time.
The solution to this problem is the compression of video files. Compression of a video refers to the process of taking the large amount of data contained within a video and compressing it so that it becomes smaller in size in order to conserve computer storage space. In other words, it is “shrinking the video size” that reduces the number of bits needed to display a video. Consequently, all of your video content will be easily published, shared, played, and stored so that you can have access to it at any time.
Compressing your video isn’t always necessary when using Mindstamp’s interactive video platform. Since compressing your video file can result in reduced quality, we recommend only compressing your video when a smaller file is needed.
In order to utilize the Mindstamp platform, you’ll need to check if your existing videos are the proper size for uploading your video to Mindstamp. For paid Mindstamp users, you can upload videos up to 10GB, whereas free users can upload videos up to 1GB.
If your existing videos are too large, there’s the possibility your videos may have buffering issues which will create a poor video experience for your users. We strongly recommend Handbrake as a FREE and fast tool for efficient compression.
Following are the steps for compressing your video using Handbrake:
Start by downloading Handbrake from their website or click here for the application to directly start downloading to your desktop.
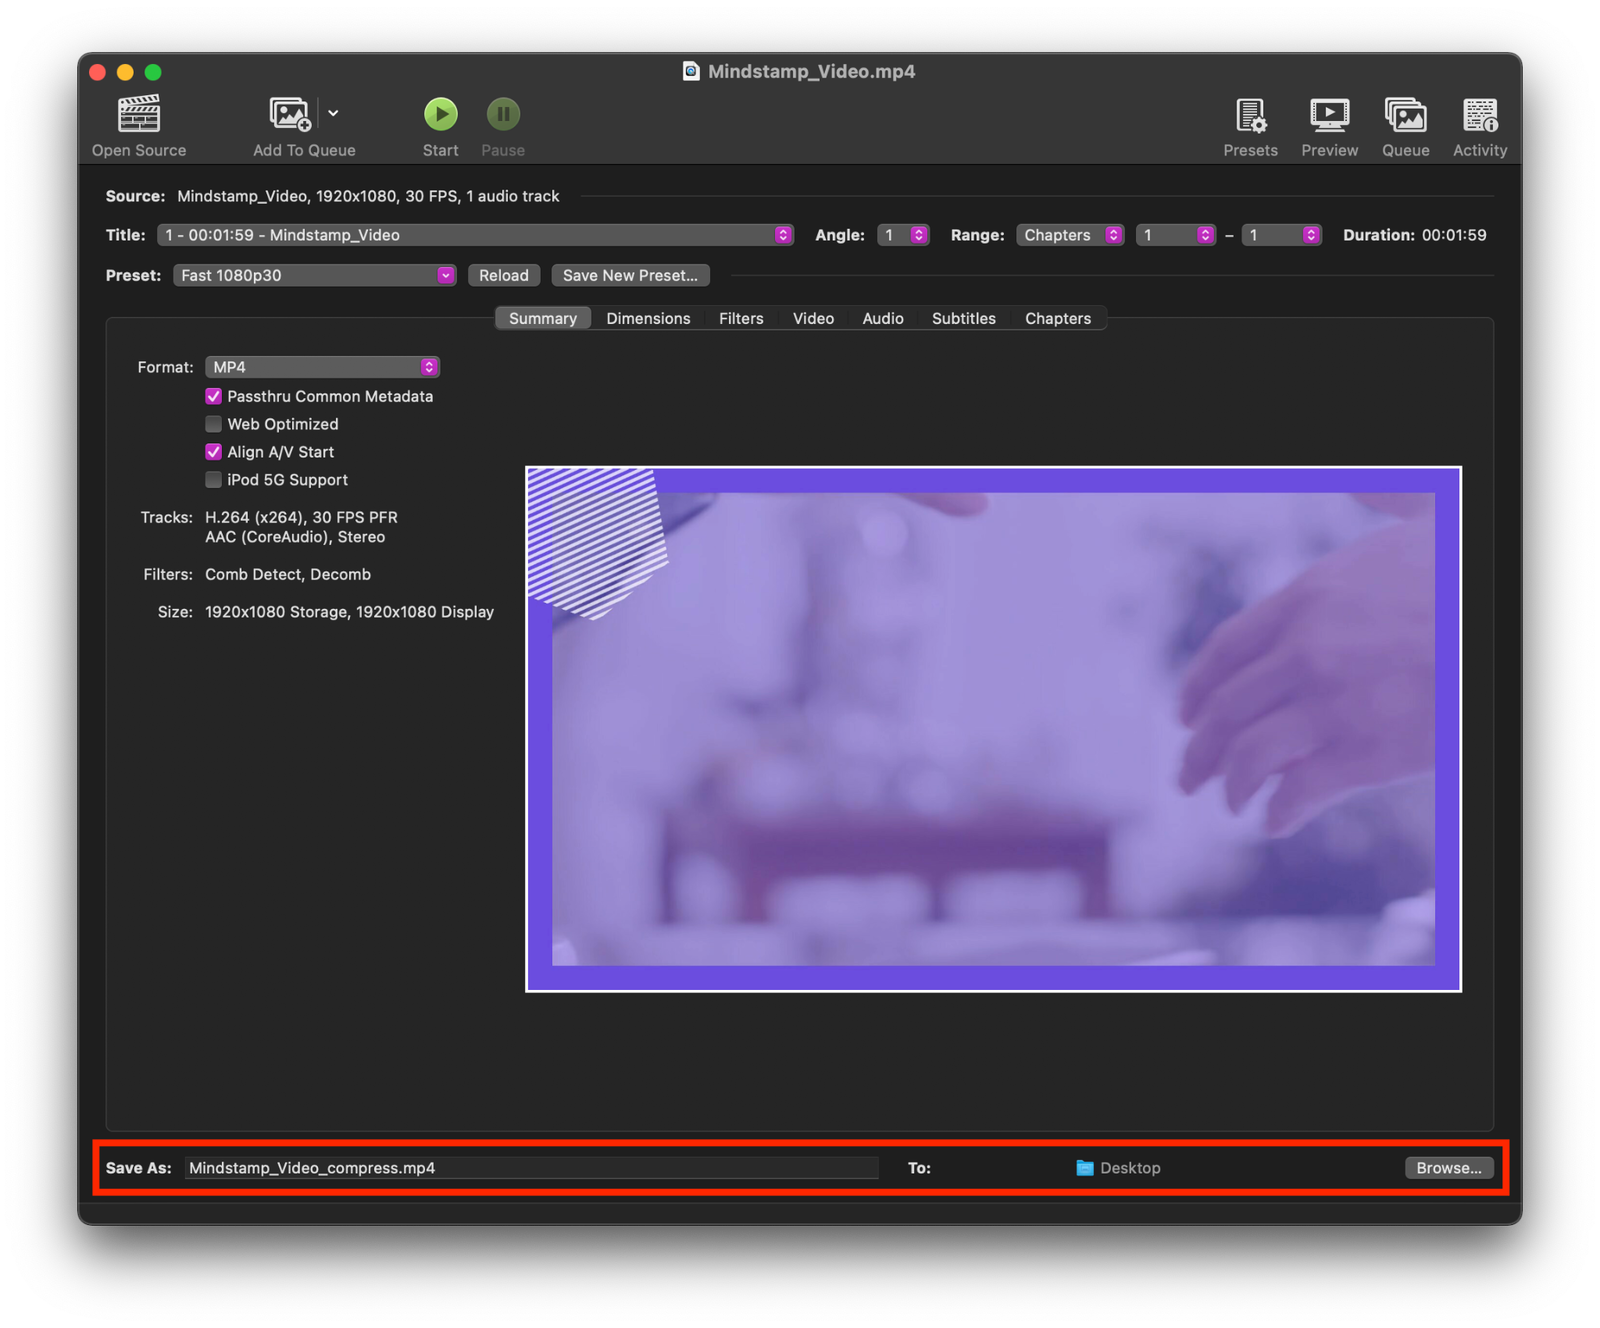
Once downloaded, open the Handbrake application and upload and rename your video:
You can choose the format and size you want your video to be exported. Handbrake offers a variety of features and presets so you can easily choose the format that works best for you:
After deciding on the size and format you want for your video, click “Start” to begin the compression process.
Once your file is finished compressing, your compressed video will be downloaded to its chosen location.
Then go to Mindstamp.io to log in and upload your compressed video file to Mindstamp to start adding interactive features!
Interested in learning more about Mindstamp’s interactive features and capabilities? Schedule a free demo or start your 7-day free trial to start creating engaging videos that drive action.


